Mounting is an operation similar to inserting a disc into drive. When DAEMON Tools Ultra is installed and integrated, you can mount images with double-click on the file in Explorer. But it is much more convenient to work with images from DAEMON Tools Ultra program.
DAEMON Tools Ultra mounts all popular types of virtual discs. The full list of supported image formats can be found in File Associations. The program also works with ZIP, RAR and 7z archives, starting from DAEMON Tools Ultra 2.4, 5.1 and 5.2 respectively. Since DAEMON Tools Ultra 5.4, you also can mount WIM archives, and DAA images.
To mount image in DAEMON Tools Ultra, click Quick Mount button and choose needed image file in dialog:
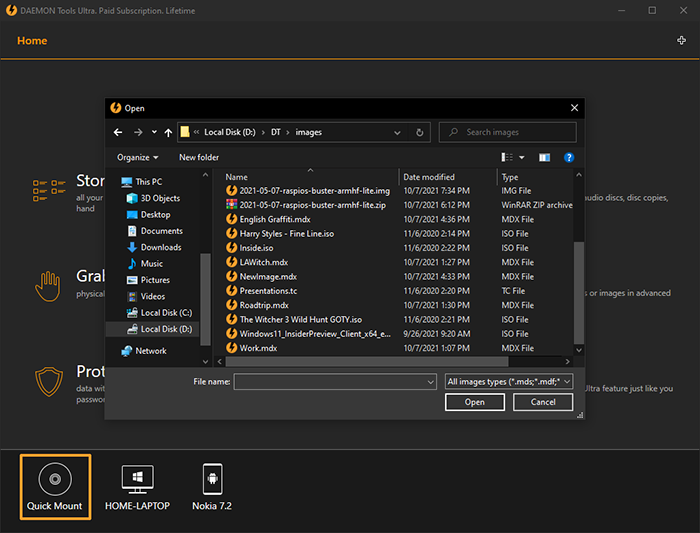
Click Open button. DAEMON Tools Ultra will create virtual device automatically, so in a few second an image will be mounted.
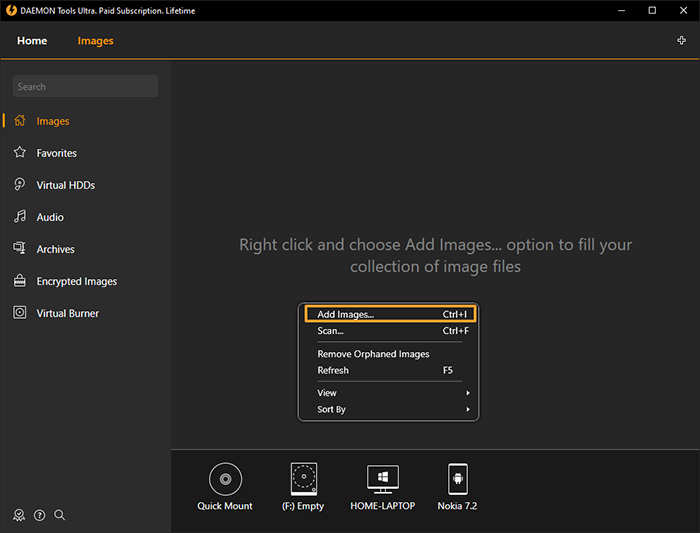
Also you can mount an image from the Images tab contextual menu. Click the Store tile, right click the Images catalog and pick Add Images....
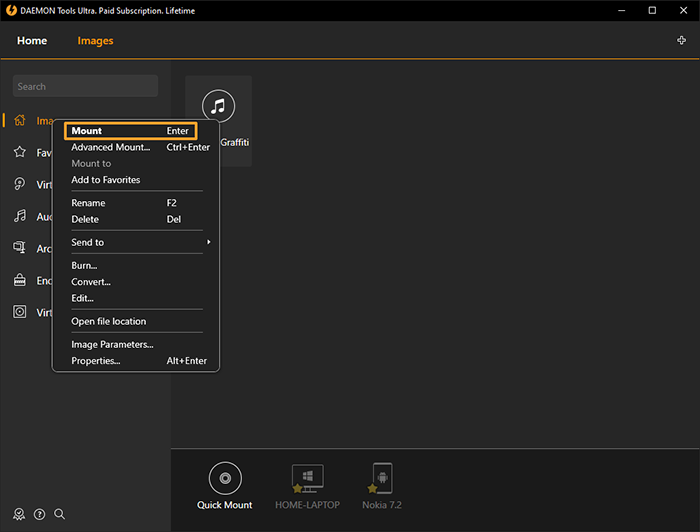
You can mount an image from Images catalog by double-clicking on it. Another option is to drag and drop an image file to the Images panel. Also you can go to the contextual menu of an image and choose Mount option:
Also, an image can be mounted from DAEMON Tools Gadget or DAEMON Tools Ultra Agent.
And finally you can mount image from Explorer directly or just drag and drop an image file from Explorer.
If an image is protected, you won't be able to mount it without a password.
In DAEMON Tools Ultra, you can adjust the emulation options while mounting an image. Advanced Mount wizard allows you to choose the mount point — drive letter, mount folder or physical device, — drive type — DT, SCSI or IDE — and DVD Region. Go to Images, choose the Advanced Mount option from the contextual menu of an image in Images catalog.
Note that SCSI and IDE functionality is limited in Windows 10.
To unmount an image, click the icon near a virtual drive in Quick Mount area, or pick the Unmount option in the contextual menu of a certain drive.