Bootable USB is used to install the operating system. To create it, enter Create a Bootable USB to the field in the main window, or click the Create tile and pick Bootable USB. Here you have several options, you can create Windows bootable image, Windows To Go, Linux bootable image and SD card ready for Raspberry Pi (DD mode). To do that, you will need to perform several easy steps:
Creating a bootable USB for Windows or Linux
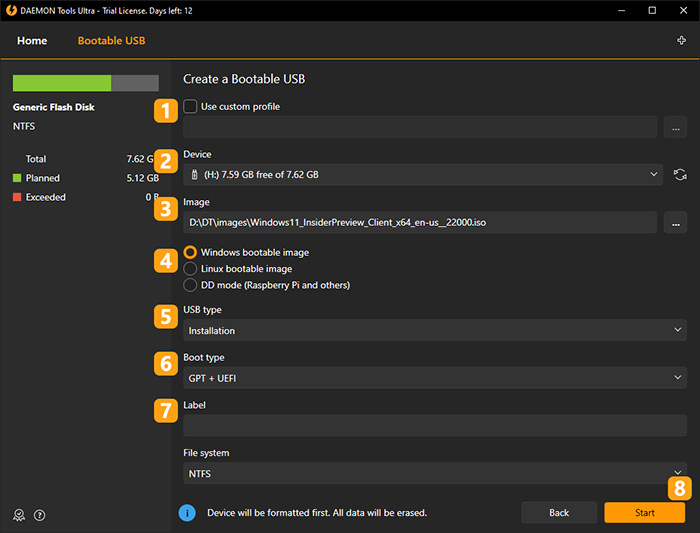
- If you have a ready Template, you can choose and Use custom profile.
- Insert a USB device and choose it in the program.
- Choose the bootable image you want to write. Use Browse... button to simplify this process.
- Choose the operating system for which a USB recovery stick is being created.
- Make sure that Installation USB Type option is chosen.
- Choose the boot type. GPT was developed for UEFI boot type and becomes more popular now. If you are not going for BIOS, this option is recommended. Since Windows 8, UEFI becomes the main boot type, but if you want to create a bootable USB device for an older operating system version, you should choose BIOS. MBR was introduced in 1983 and for some time was the only one standard. You can use it now too, but note that this partition type isn't not working with 2TB+ disks.
- Choose the type of the file system and the label of the volume.
- Click Start button to begin creating a bootable USB or Back button to return to Images.
Note, that you can create bootable USB for Windows Vista and later OS versions only.
Creating a Live USB
Windows To Go feature appeared in DAEMON Tools Ultra 5.3: it permits to create the independent workspace on your USB drive. Thus, you can use this workspace on any PC just after you plug in your Hard Drive.
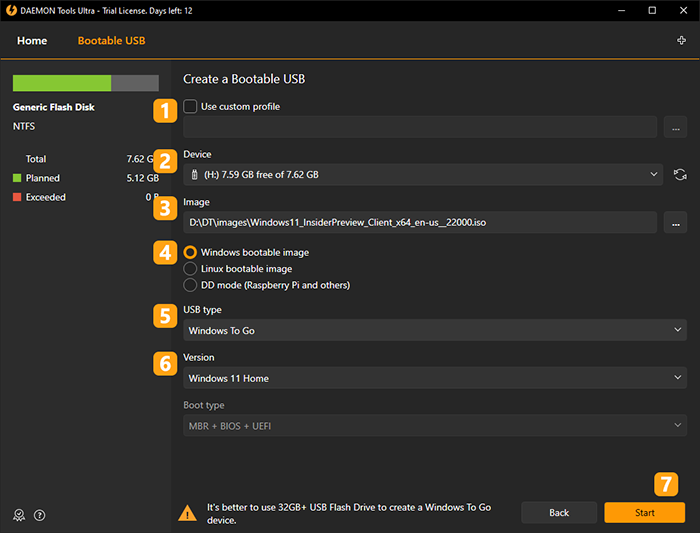
- If you have a ready Template, you can choose and Use custom profile.
- Insert a USB device and choose it in the program.
- Choose the bootable image you want to write. Use Browse... button to simplify this process.
- Choose Windows bootable image.
- Make sure that Windows To Go USB Type option is chosen.
- Choose the Version of Windows.
- Press Start to create Windows To Go.
Note, that you can create the portable workspace with Windows 10 or Windows 11 only.
Creating an SD card for Raspberry Pi
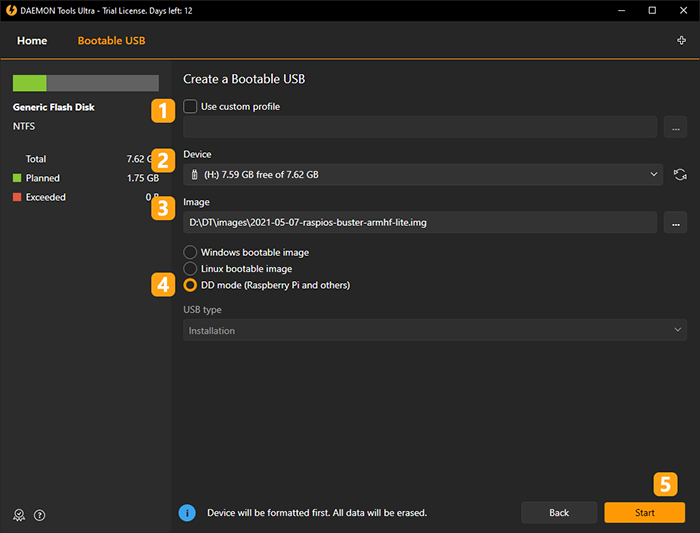
To install Raspberry Pi system on Hard Drive you need to complete the following steps:
- If you have a ready Template, you can choose and Use custom profile.
- Insert a USB device and choose it in the program.
- Choose the image file. Use Browse... button to simplify this process.
- Choose the DD mode (Raspberry Pi and others) option.
- Press start to launch the process.
If you need to create a backup for Raspberry Pi OS check out the Grab or Format a USB article.